Exploring the Digitals Pins - Arduino Uno
- automatelabonline
- Feb 20
- 4 min read

Updated: Feb 21
Digital Pins of Arduino Uno
The Arduino Uno is one of the most widely used boards among prototyping and electronics enthusiasts. Its versatility, accessibility and vast support community make Arduino an excellent choice for those who want to practically understand the fundamentals of programming and digital electronics.
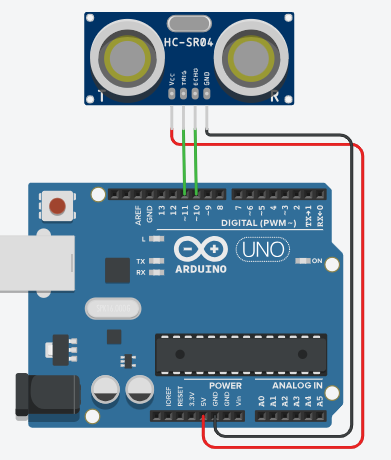
One of the first steps to start programming these boards is to understand how the digital I/Os work. The digital pins correspond to terminals 0 to 13 on the board.

Its behavior is simple: each pin can be configured as either an output or input and has two states: active (HIGH) and inactive (LOW).
When configured as an output, the pin can be set to a low logic level (0V) or a high logic level (5V). This allows for simple actions, such as turning on an LED, for example. Digital outputs cannot have an intermediate voltage, such as 2V. The Arduino can only set the pin to either 0V or 5V.
When digital pins are configured as inputs, the pin is capable of reading high or low logic signals. These inputs are useful for reading buttons, for example. There are two types of input configurations: INPUT and INPUT_PULLUP.
When configured as INPUT, the pin will have a low logic level when nothing is connected, meaning its default voltage is 0V. When configured as INPUT_PULLUP, the pin will have a high logic level when disconnected. These two types of input only differ when they are left unconnected. When a sensor providing a digital voltage is connected to these pins, the behavior of both types of ports is the same.
Functions for the Pins
Configuring the Pins
To initially configure the pins, the function used is:
pinMode(PIN, MODE);In PIN, you choose the pin you want to configure, which can be a value between 0 and 13. In MODE, you select the mode in which the pin will operate. The available modes are:
OUTPUT: Works as a Digital Output, generating voltages of 0V or 5V.
INPUT: Works as a Digital Input, reading voltages of 0V and 5V, and its default voltage when unconnected is 0V.
INPUT_PULLUP: Works as a Digital Input, reading voltages of 0V and 5V, and its default voltage when unconnected is 5V.
Reading the Digital Inputs
The function used to read digital inputs is:
digitalRead(PIN);PIN represents the number of the pin you want to configure. This function returns an integer that specifies the state of the pin. It returns 0 when the pin is at a low logic level (0V) and 1 when it is at a high logic level (5V). The definitions HIGH and LOW can be used to represent the logic levels. By default, HIGH is defined as 1 and LOW as 0.
Configuring the Digital Outputs
To send a voltage to the digital outputs, the function used is:
digitalWrite(PIN, STATE);PIN represents the pin number, and STATE represents the logic level you want to set. The pin state can be configured using HIGH (to generate 5V) and LOW (to generate 0V).
Project - Reading a Button and Lighting up an LED
To put into practice the knowledge about digital inputs and outputs, we will create a project using an Arduino Uno, an LED and a button.
In this project, the Arduino will read the button, and when it detects that the button has been pressed, it will turn on an LED. When the button is released, the LED will turn off.
Below is a schematic of the connections for this project. When the button is pressed, pin 7 on the Arduino goes to a high logic level. When released, it returns to a low logic level. Pin 6 is connected to an LED, and when this pin is set to 5V, the LED will light up.

Below is the code for this project.
#define PIN_LED 6     // Defines the pin for LED
#define PIN_BUTTON 7  // Defines the pin for the button

void setup() {
  pinMode(PIN_BUTTON, INPUT);  // Configures the button pin as input
  pinMode(PIN_LED, OUTPUT);    // Configures the LED pin as output
}

void loop() {
  if(digitalRead(PIN_BUTTON) == HIGH) {
    digitalWrite(PIN_LED, HIGH); // If button pin is on high logic level, light up the LED
  } else {
    digitalWrite(PIN_LED, LOW);    // Else, turn off the LED
  }
  delay(10);
}
Understanding the Code
Right at the beginning of the code, we have the definition of two variables. PIN_LED represents pin 6, which is connected to the LED, and PIN_BUTTON represents pin 7, connected to the button. It is always a good practice to use definitions during programming, as it makes it easier to change a pin later on in the project if needed.
Next, we have the setup() function, where the two pins are configured as output (PIN_LED) and input (PIN_BUTTON).
void setup() {
  pinMode(PIN_BUTTON, INPUT);  // Configures the button pin as input
  pinMode(PIN_LED, OUTPUT);    // Configures the LED pin as output
}
In the loop() function, we have a condition. If the button reading is HIGH, meaning it is at 5V, the LED pin is also set to 5V. This makes the LED light up. If the button reading is LOW, meaning 0V, the LED pin is also set to 0V. A delay of 10ms is used because it's not necessary to check the button state so frequently, which helps save some power.
void loop() {
  if(digitalRead(PIN_BUTTON) == HIGH) {
    digitalWrite(PIN_LED, HIGH); // If button pin is on high logic level, light up the LED
  } else {
    digitalWrite(PIN_LED, LOW);    // Else, turn off the LED
  }
  delay(10);
}
Conclusions
In conclusion, the digital inputs and outputs of the Arduino Uno are essential components for creating a wide range of electronic projects, from the simplest to the most complex. They allow the microcontroller to interact directly with external devices, such as sensors, LEDs, buttons, and other components, making it easier to implement creative and practical solutions.
These functionalities play a crucial role in learning and practicing digital electronics, serving as an excellent starting point for those who wish to deepen their knowledge in the field and expand their skills in interactive and automated projects.


コメント